Showing posts with label Etsy. Show all posts

Friday, June 1, 2012

High Five for Friday - Link up, Vol. 8

Can I just say that I can't believe it's Friday already!! I mean, where did the week go? Well, coming back mid-week from vacation/traveling will do that to you, I guess. I'm feeling a little overwhelmed at the moment...just with coming back to lots of work, catching up on laundry/cleaning, etc...but I am most definitely looking forward to the weekend! What about you?? :P

Since it IS Friday, you know what that means...it's my weekly link-up with
Lauren over at From My Grey Desk for:


So my FIVE favorite things from this past week are...


ONE. Finishing my 1st 10k Race

I plan on including more about the race in a longer post soon...but I finished in just over an hour, ran almost the whole thing, and felt SO GOOD afterwards!

TWO. Much needed Memorial Day pool time


 This took place right after the race, so need I say more?! :)

THREE. My Etsy Shop's 1st Sale


I am so excited to announce that I had my 1st sale from my new(er) Etsy shop - Plenty of Pins. I opened it up back in April, posting a bunch of handmade bobby pins, and just sold the dark pink flowers on the far right.

FOUR. This beautiful stone

What a motto to live by!!

FIVE. My Beauty Giveaway!!!!

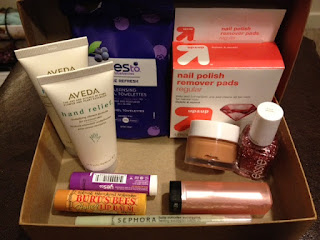
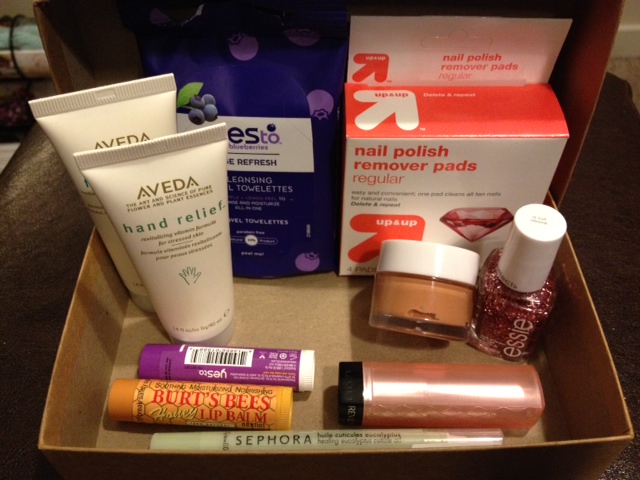
In case you didn't know, I posted a giveaway yesterday - I'm giving away some of my favorite beauty products (seen in the photo)...there are many ways to enter, so head on over to the post! You have until next Wednesday at 11:59 pm to enter!

Can't wait to see what some of you are posting for H54F! Have a great weekend :P

Thursday, April 19, 2012

Stocked Full of Memories

So, this past fall, my parents moved out of the house that my siblings and I grew up in...it was a good decision for them at the time, but sort of sad too. It meant that "home" would have a very different feel each time I visit, and it also meant that I would have to go through all of the memorabilia that I still had stored there, dating all the way back to grade school (yeah, I'm serious). It was fun going through it all, even if it meant getting rid of some things. You know, those things you come across and think to yourself "Um, why the heck do I still have this?!" But nonetheless, it meant something to me at one point or another. So while going through all of my belongings to choose what I would keep/pitch/donate, I came across a TON of old t-shirts from almost every dance recital and musical that I was ever in...and there were a lot. That was definitely something I wanted to hang onto, but what was I going to do with them?! Some of the dance recital shirts are from when I was a little girl, so the t-shirt would obviously NOT fit me! Well, my sister came across a company that takes your t-shirts & turns them into a quilt. Now, I know this isn't a new concept...people have been doing this for years upon years. But needless to say, I knew this was my best option & I couldn't wait to have a quilt made out of all of my own t-shirts!

The company I went with is called 3 Stitch Creations and they're located in Reynoldsburg, Ohio. They were great to work with, very communicative from the time they received my t-shirts (because who really wants to mail those things off, in fear of them not getting to where they are supposed to, and ultimately getting lost forever) to sharing with me the final product before even mailing it to me. The experience was great! They offer all different sizes of quilts (which is dependent on how many t-shirts you send them) and customize it just to your liking. You decide the color of the backing, the stitch design, and you proof the final design before they begin stitching it together. I think their prices are very reasonable (and again, depend on the size of the quilt)...I mean, I can't imagine how many hours go into a quilt like this. But anyway, here is my finished product, that is now in my possession:

As you can see, mine is very colorful & I was very active as a kid!
Backing: Black
Stitch: Loop-the-Loop
Size: Lap Quilt (15-20 shirts)

You can see the stitch detail here:

*This was the t-shirt I was talking about that was teeny-tiny...my 1st ever dance recital back in '89-'90!

I can't really express into words how much this quilt means to me - every time I look at it, I am flooded with memories from each and every recital/show! I would have loved to be able to do it myself, or have known someone that quilts who could have taken on the project, but I am extremely happy that I went with 3 Stitch Creations - they do amazing work. They also have an Etsy Shop, which makes ordering even easier! Just think about all of those t-shirts you have lying around or stowed away in dresser drawers - they would look great made into a quilt! :) One of the most popular quilts that they create are for sports teams - so maybe your hubby has a favorite sports team & has tons of apparel - get a memorable quilt made!

Hopefully this gives you a great idea to put your old t-shirts to good use!

Friday, April 13, 2012

High Five for Friday - Link up


Today I'm linking up with Lauren over at From My Grey Desk (FMGD) for her weekly "High Five for Friday" post. Basically, it's just a list of 5 favorites from this past week...it can be anything! :)
So here it goes...

ONE. My first vlog! And just getting back to my blog, in general. But yeah, I filmed my 1st video blog, linking up with Mandy at House of Rose on Wednesday, for "Stop & Smell the Roses". It's not a fancy video, but just highlights the things I'm thankful for this week. I have let my blog sit here for FAR too long & really want to keep up my posting momentum!!
  
TWO. Tuesday, April 10th was Toms Shoes' One Day Without Shoes event, worldwide! It's a yearly event in which people are challenged to go without shoes for the day. Or, if you aren't able to, at least use the day to spread awareness about Toms Shoes and the One for One Movement. I wasn't able to go the entire day without shoes, but here I am at work rocking the day barefoot:

*coral toes for Spring :)

THREE. I received my latest jewelry purchases from Elisabeth Ashlie Jewelry (a small business owned by two sisters living in NC, Kate & Lauren <---the Lauren I'm linking up with for this post). They both have excellent taste and produce some of the most beautiful, classy jewelry pieces! Isn't the elephant charm on the bracelet SUPER cute?!

Check out their Etsy shop here.

FOUR. The new show on ABC called Scandal, by Shonda Rhimes (also creator of Grey's Anatomy & Private Practice). It's only into it's 2nd episode, but it's a GOOD one! The basic premise of the show revolves around Olivia Pope, the former Communications Director for the President of the United States, who now runs a private crisis managment firm. Her and her team work to defend the reputations of some of the nation's elite...needless to say, there's lots of drama!


FIVE. If you are a One Tree Hill fan, you'll appreciate this next one! Last night, I was lucky enough to meet Genna Poletti, one of the twin sisters who played Chris Keller's (Red Bedroom Records') interns on Season 9 of OTH. She and her twin rock awesome arm-sleeve tattoos, and they're both gorgeous...she was super nice to meet too. She's in Charlote working on Mark Schwann's upcoming project/tv show.


Alright, well until next time...thanks for hosting Lauren! :)

Saturday, June 5, 2010

To Dye For

Well, I figured that it was about time that I blogged about my newest knitting obsession...dyeing yarn at home! I've been knitting for about 3 years now. I started out buying the inexpensive, easily attainable yarn at Hobby Lobby, even Walmart. There's nothing wrong with this yarn...I still buy it. However, as the years have passed, my taste has gotten a little bit more expensive...shopping at LYS's (Local Yarn Shoppes) that carry fancy shmancy yarn that takes a bit more out of the pocketbook. And since I have moved to Monterey and joined the local knitting group...I have been introduced to the latest trend in the fiber fabulous yarn world...indie dyers, hand-painted yarn, hand-dyed yarn, etc. Yarn that started out as a plain canvas and has been dyed to create masterpieces (literally), most of them even having names (see here).

So, after doing a little research, I decided to venture out and try to dye my own yarn. I read a few tutorials...here...and here. And then just decided to go for it. Here is a skein of yarn I dyed about a month ago...and a short tutorial on how I went about the dying process:

"Pretty in Pink"


Step 1: Gather materials: Crock pot, Wilton's Icing Dye, Vinegar, Measuring Cup, H2O


Step 2: Choose color(s) you want to dye with. For "Pretty in Pink" I chose to use only 1 dye, Rose. You may dye with as many colors as you want.

Step 3: Fill the crock pot with 1/2 cup of Vinegar, place skein to dye in the crock pot and fill with H2O until the skein is covered. Let it soak for about 20-30 minute in the vinegar/H2O solution.

Step 4: Turn crock pot on high and let it begin to heat up to about a warm temperature.
Step 5: While it is heating up, mix 1/4 tbsp. of Wilton's Icing Dye with about 1 cup of boiling water in a measuring cup or mason jar. The icing dye comes in a gel form, so make sure the water is boiling to ensure it is completely dissolved. Once completely dissolved, pour dye into crock pot as it reaches the warm temperature.

Skein and dye in crock pot heating up

Step 6: Let skein dye in crock pot for 1 hour, reaching the temperature on the High setting, but not to a boil. Check and make sure that the skein has taken up all or most of the dye by dipping a spoon into the dye water...the water should be mostly, if not completely clear. Turn off the crock pot, take the lid off and let cool (until the skein and water reaches room temperature). 

Step 7: Rinse skein (very little to no dye should be seen when rinsing) and I also soak the skein in some Soak wash (if I have some on hand) to get the vinegar-like smell to go away.
Step 8: Hang the skein to dry (to speed up the process, I typically put a fan to it) and re-skein if necessary. (Note: I didn't re-skein this one...I liked how it looked with the variations of pink)

And, TA-DA...I got a little something like this:

You can see where the dye picked up more in some areas than others, but it gives it a cool effect!
Overall, I was very happy with this skein...it is posted on my Etsy shop!! :)

And here is another skein that I dyed (using a different method) and a short tutorial on its process:

"Rustic Skies"

Step 1: Gather materials: Canning pot, saran wrap (the good kind, NOT the cheap kind or it might melt to the skein), Wilton's Icing Dyes, glass pie plate, squeeze bottles (found at Walmart), paper towels, H2O

For this skein, I used Wilton's Icing Dyes: Violet and Brown

Canning pot...sorry not as many pictures of this process :)

Step 2: Soak yarn like previous tutorial (I typically use my crock pot for this soaking as well, without turning it on) in vinegar/H2O solution for 20-30 minutes.

Step 3: While yarn is soaking, prepare dye the same way and pour into squeeze bottle(s). It helps to let the dye mixture cool a bit before pouring into squeeze bottle(s). 

Step. 4: Lay out a few layers of saran wrap onto flat surface (helps to put newspaper or plastic table cloth underneath to protect surface). Once skein has soaked, ring skein out and place onto saran wrap.

Step 5: Apply dye however you like to your skein...lengthwise, stripes, zig-zags, etc. You may want to flip skein over and apply dye to other side as well. Wrap skein up in saran wrap (bring top down over skein, bring bottom up over skein and roll into a pinwheel...if saran wrap has too much liquid from the dye, you can wipe up with paper towels or transfer skein to new saran wrap and wrap up. 

Step 6: Cover bottom of canning pot with water, place glass pie plate onto jar rack upside down and bring water to a boil. Place pinwheel-wrapped skein on the center of the pie plate, like so:

Step 7: Cover with lid and let steam in the canning pot for 1 hour. After the 1 hour, turn stove off, take lid off and LET COOL...the plastic and skein will be hot. Once cooled, unwrap skein and rinse/wash/dry like first tutorial.

And, VOILA:

I re-skeined this one to get a more variegated look.
It is also on sale in my Etsy shop! :)

Well, there you have it...2 methods of dyeing yarn that I have experimented with. I am nowhere near an expert on this and am learning more and more about it each time I attempt to dye. But it is really fun to experiment, especially with different color combinations...and I am proud to say I sold 2 of my dyed skeins:

"Peaches 'n Cream" & "Mermaid Tails"

It was a proud moment but I was kind of sad to see them go. :( Anyway, this was a super-long post, hope you all have made it this far and enjoyed reading about yarn-dying! Thanks for reading!

Tuesday, April 13, 2010

My First Sale on Etsy!!!!

OMG, I was so excited yesterday afternoon...I received an email notifying me that I had received my first sale on Etsy! Holy freakin' cow!!!

Now, to back up, I started hand dyeing a few skeins of yarn a few weeks ago...a few of us girls even got together and had a yarn dyeing 'pow wow' one Sunday! :) And I figured, well, I might as well start an Etsy shop and put 'em out there! FYI: I have been planning on posting about the yarn dyeing and my process...but just haven't gotten a chance yet...so be on the lookout! Anyway, the yarn has been in my shop for about a week now...has been viewed a little bit. Well, I decided, maybe it was a good idea to pay the $7 to have it showcased on the Main knitting page for a day. Well, it evidently helped A LOT!! My yarn got so many more views and I got a sale for 2 of my skeins!! AAHHHH!!! I'm a little sad to see them go...hehe...but the money makes me feel a bit better. :)

On the left side of my blog, below the About Me section, you can find a link to my Etsy shop!!